Use topics to provide your students with materials organized by theme, chapter, unit, etc. Each topic has a cover photo and description, and a detail page to contain downloads, links, embedded video, and other materials related to your defined topic. This article will discuss adding and importing Topics, adding materials to a Topic, editing settings for a Topics page, and prioritizing Topics.
Adding a Topic
In order to add a topic, go to "Topics" on a class page. Then click on the "Create Topic" button. The resulting window requires a host of information. Refer to the screenshot below.
- Give the Topic a title.
- You may add additional text that will appear on the general topics page below the title. This section has a WYSIWYG editor with several options to style the text.
- Choose a cover photo by using the "Browse" button or dragging and dropping an image. Having an image goes a long way to making your Topics page appealing. If you don't have readily available images, the web has many sources for clip art and images.
- Choose a layout. Think carefully about how you want your information to appear because the Bulletin Board feature has similar layout options. Being consistent about where you put your information and making things as convenient as possible for students are important considerations. For example, having three equal columns allows you to give three different types of information equal priority, without the need for a student to scroll down the page. A banner on top gives one item top priority.
- Click "Share with a class section" if you would like to publish the Topic to more than one section - even to another teacher's class.
- Click the Edit checkbox so that both you and the other teacher can both edit the Topic. When this box is checked, you'll both have the Topic show up the same way on both your class pages and both can edit it. So if one teacher edits it, the change will show up in both places.
- Click "add to Topics Bank" if you think another teacher could use your page.
- Click the sections of your classes that will see the Topics Page. Change the publish date to control when the material will be available to students.
- Save your settings.

Importing a Topic
Import a Topic from previous years or another class by clicking on the "Import" button beside "Create Topic" on the right. In the next window use the drop down menus to select the school year and course that contains the desired Topic. Click on the gray check mark to include the item on your page. Set the publish and expire dates as desired. Click "Save."
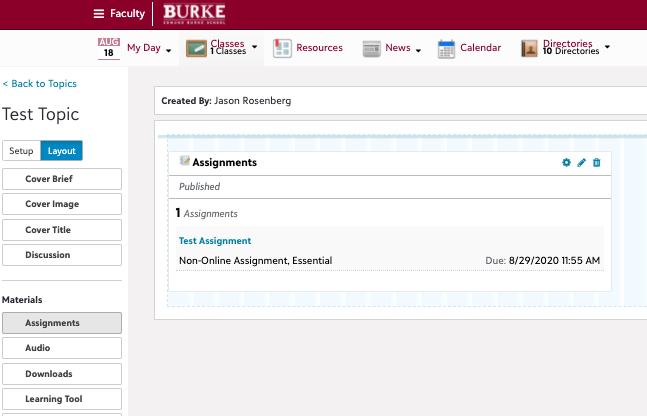
Adding Materials
The editing screen for a topic is very similar to the editing screen for the Bulletin Board, with a menubar on the left containing gray boxes for the different categories of content you can add.
Add material by dragging a gray box from the bar on the left. Note that the bar on the left has its own scroll bar and that you can move it to see more materials.
When you drag an item from the bar, hover it over your desired location until dashed lines appear. Let go in order to drop it in place.

As soon as you drop the item in place, a window will appear asking you to enter the required content. To add material you have uploaded previously, click on "Add Existing" at the top of the window and navigate to the necessary year and course. When you are finished, click "Save" at the bottom of the window.
- In order to edit any element, click
 .
. - To order to delete any element, click
 .
. - To set publishing days/times click
 .
.
Update: You can now add multiple assignments directly into a Topic page
Tips on Materials
Links will ask you for a title, description, and a URL. Audio, Downloads, Video, and Photos will ask to for a title and to drag or navigate to a file to upload. When showing video, however, the best practice is to use the Embed material rather than the Video material. You can embed video, Quizlet sets and many other types of material from the web. See embedding a video from youtube.
The buttons above the Audio material allow you to publish the photo, text or blurb you used for the Cover onto the Topics page.
Discussion allows you to create a place for students to have an online discussion. You can write an initial post, and have students reply to it, and to each other's responses. There is no way to begin a new thread with this feature. To begin a new thread, you have to put a new discussion category into a Topics page.
Editing Settings
To edit your original settings -that is, layout, title, photo, subtext or publishing details - click on the pencil icon at the top of the relevant topic in your Topics page. Then click "Setup" below the topic title on the left, then on the "Edit Settings" button. The "Layout" button to the right of the "Setup" brings you back to the materials editing screen.
At any point, click on "Preview Topic" to see how the page will look when published.
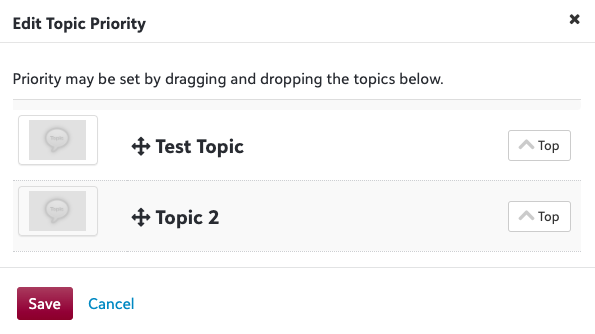
Prioritizing Topics
By default, the most recent Topic you create will be shown last. If you have many Topics, you will probably want students to see the most recent material first, without scrolling through all the old material.
To prioritize Topics, click on the ![]() button. The resulting window (screenshot below) shows a list of the Topics on your page. Click the
button. The resulting window (screenshot below) shows a list of the Topics on your page. Click the ![]() button to bring a Topic to the top of the window and display it first. Save when you are done.
button to bring a Topic to the top of the window and display it first. Save when you are done.
Comments